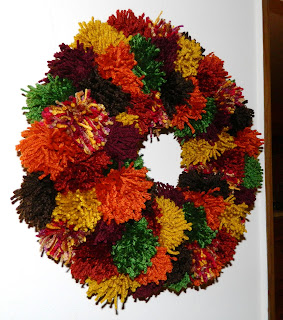
I just finished making this for my mom to celebrate autumn approaching. Here is the finished product hanging up on the wall in my parents' house.
It all started with picking out at least 6 different colors of yarn, a straw wreath, and some coordinating felt to wrap the straw wreath. No glue needed, just some scissors and maybe a piece of tape to stick on the last flap of felt that is being wrapped.
The whole process happened over the course of about three days, but that was only because I only had random chunks available to me. I also did some multi-tasking while watching some sports and some reality television.
I cut the felt into 3 inch wide strips. The color I picked was "goldenrod." I also bought a little wreath in case I had some leftovers (and I did!).
I wrapped the straw wreath. Note: you should probably leave the plastic on the straw, otherwise be prepared for a whole heap of a straw mess. :(
The lovely fall colors that I chose.
Time to wrap some yarn! To get medium sized poms, I wrapped the yarn around my four fingers 50 times.
Cut a strand of yarn about two feet long to tie around the pom. Tie a double knot.
Tighten the knot.
Cut the loops and watch the pom develop!
The strands should be long enough to tie around the wreath. I made sure to make about 10 poms of each color yarn.
A pile of poms!
Pom placement time!
I like to make a pattern and follow the same pattern all the way around the wreath.
The seven different poms fit around the wreath exactly three times each.
What the back looks like. I waited until I did a couple rows to trim the ends.
In total, it took four or five rows to make it look plush and cover up the edges.
If you want, you can wrap the poms all of the way around the wreath, I left a flat side so that it could either be hung up on the wall or used as a centerpiece lying down on the table.
Once you have the plump-ness that appeals to you, you can call it quits and enjoy!
I hope you enjoyed this DIY and now to think up my next crafting adventure... :)


